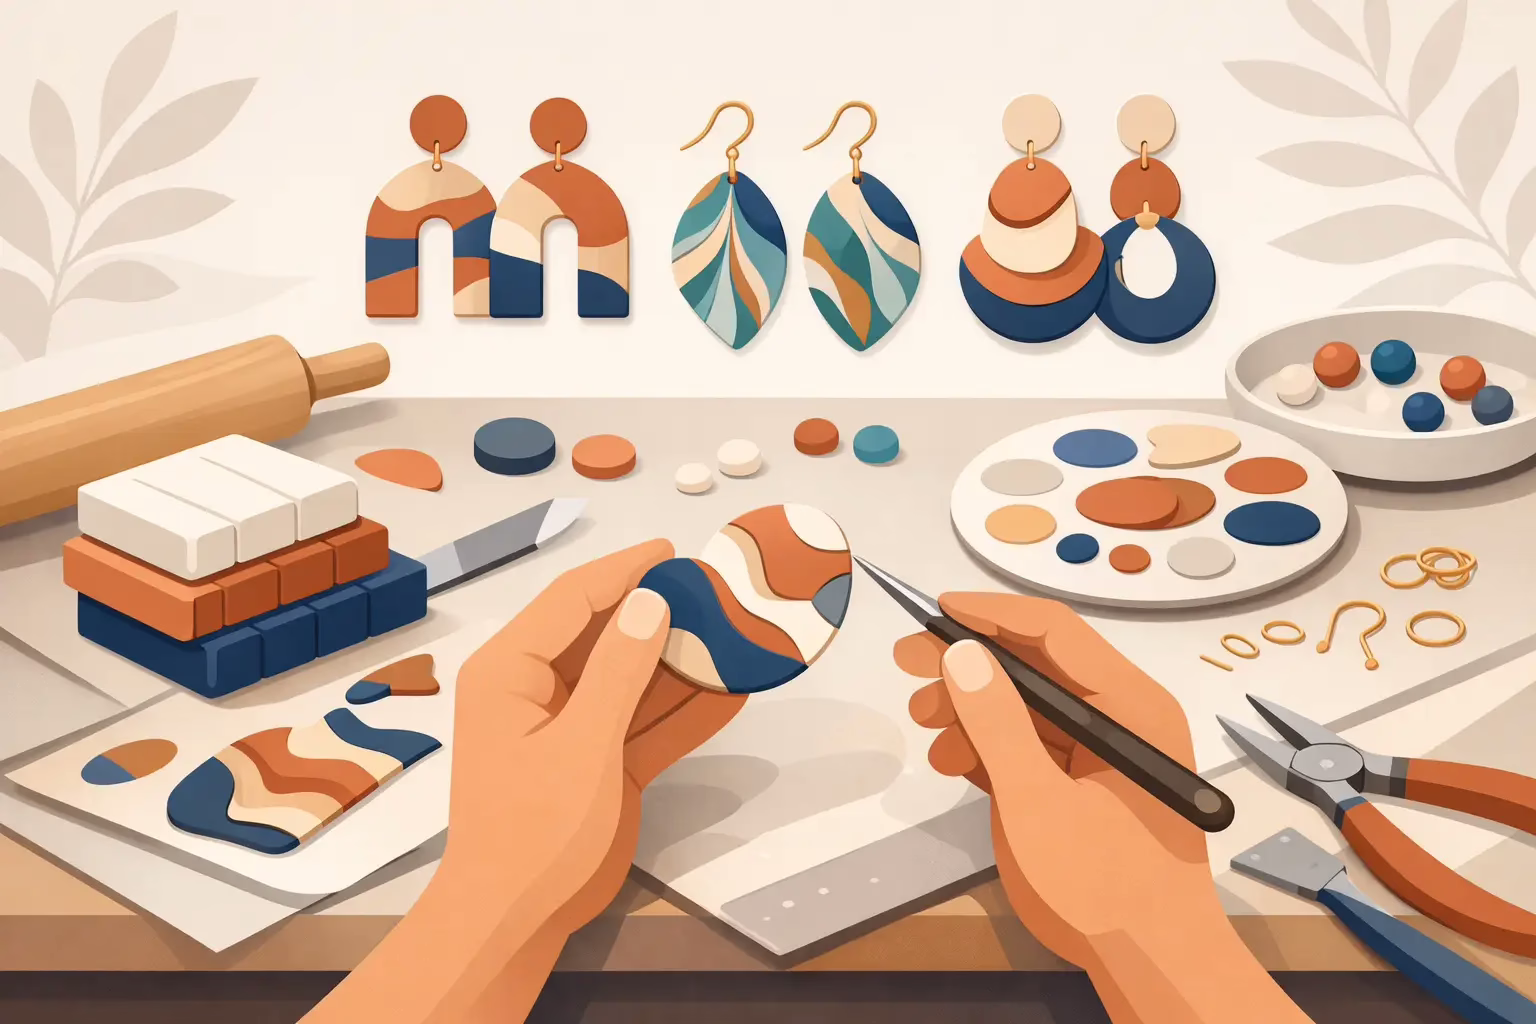
A pair of handmade clay earrings can look playful, polished, earthy, bold, or quietly elegant – and that range is exactly why polymer clay keeps so many makers coming back to the worktable. Polymer clay jewelry making techniques give you room to experiment with color, shape, texture, and finish without needing a full metalsmithing studio. If you love jewelry that feels personal, artistic, and a little bit one-of-a-kind, this material has a lot to offer.
What makes polymer clay especially appealing is how forgiving it can be. You can blend colors, reshape pieces before baking, add surface detail with simple tools, and create styles that feel boutique-made even when you are still learning. At the same time, good results do not come from luck alone. The difference between a charming handmade piece and one that cracks, burns, or feels bulky usually comes down to technique.
Why polymer clay works so well for jewelry
Polymer clay is lightweight, versatile, and surprisingly design-friendly for wearables. That matters most with earrings, where comfort can make or break a piece. You can create oversized statement shapes that still feel easy to wear, or make layered pendants and charms without the heaviness that comes with many other materials.
It also plays well with different aesthetics. If you love boho styles, soft earthy palettes and organic textures are easy to create. If your taste leans colorful and modern, you can build graphic patterns, bright terrazzo looks, or clean geometric forms. For gift-making, polymer clay is especially lovely because it can feel handcrafted in a very visible way. The tiny marks, hand-mixed colors, and thoughtful finishes are part of the charm.
Essential polymer clay jewelry making techniques to know
Before getting fancy with patterns or sculptural details, it helps to get comfortable with the foundation. Most polymer clay jewelry making techniques build on a few core skills: conditioning, shaping, cutting, texturing, baking, and finishing.
Conditioning for strength and smoothness
Conditioning is simply working the clay until it becomes pliable and even. This step is easy to rush, but under-conditioned clay is more likely to crack or crumble, especially in thinner jewelry pieces. You can condition by hand or use a pasta machine dedicated to clay. The clay should feel soft enough to roll and fold without breaking apart.
If the clay is too sticky, it may be warm or overly soft, which can make crisp shapes harder to achieve. If it is too firm, it may need more working time or gentle warming in your hands. There is a balance here. Softer clay is easier for blending and marbling, while firmer clay is often better for sharp geometric cuts.
Rolling an even slab
Many jewelry designs start as a flat slab. An even thickness matters because it affects both appearance and durability. If one side is thinner than the other, the piece may bake unevenly or feel fragile at the edges. Acrylic rollers, tile surfaces, and thickness guides can help, but careful hand rolling can also work if you pay attention.
For earrings, thinner is not always better. Very delicate slabs can look refined, but they may not hold up well in daily wear. A slightly thicker piece often feels more substantial and lasts longer, especially for larger statement styles.
Clean cutting and shape building
Cutters are popular for good reason. They help create consistent arches, circles, teardrops, and other classic shapes. But a cutter alone does not guarantee a polished look. Pressing straight down, lifting carefully, and removing excess clay cleanly all matter.
Freehand cutting is worth learning too. A tissue blade or craft blade lets you create custom silhouettes that feel more artistic and less cookie-cutter. This is often where handmade jewelry begins to show more personality. If you want a softer, organic look, slightly irregular edges can feel beautiful. If you want a more modern finish, crisp lines and symmetry matter more.
Texture and surface design
Surface detail is where polymer clay becomes especially expressive. You can press in lace, fabric, stamps, leaves, textured tiles, or simple household objects to create pattern. You can also build visual depth with techniques like marbling, color blocking, terrazzo, mica shifting, or layered cane slices.
The best choice depends on the style you want. A matte neutral earring with subtle texture feels very different from a bright marbled pendant with a glossy finish. Neither is better. It depends on whether you are aiming for everyday softness, bold statement energy, or something giftable and playful.
Piercing and assembly planning
One of the easiest mistakes in clay jewelry is forgetting how the piece will hang before it is baked. If you need holes for jump rings, add them before baking unless your design truly requires drilling later. Hole placement affects balance, movement, and comfort. A beautiful shape can still hang awkwardly if the connection point is off.
This matters even more for dangles. If the top component is too small for the lower piece, or the lower piece is too heavy in relation to the post, the finished earring may tilt forward. A little planning here saves frustration later.
Baking techniques that protect your work
Baking is not the glamorous part, but it is where many projects succeed or fail. Polymer clay needs accurate temperature and enough baking time to cure properly. An oven thermometer is one of the most useful tools you can own because many home ovens run hotter or cooler than expected.
Underbaked clay often feels firm at first but can become brittle over time. Overbaked clay may discolor or scorch. Tenting pieces loosely with foil or baking on cardstock over a ceramic tile can help prevent darkening, especially with lighter colors.
Patience matters here. It can be tempting to pull pieces early, especially when they seem done on the surface. But jewelry that is cured thoroughly is usually stronger and more reliable. Let pieces cool fully before testing or finishing them.
Finishing techniques that make handmade pieces look polished
Finishing is where your work starts to feel truly wearable. After baking, edges can be refined with fine sandpaper if needed. Some makers prefer a super smooth finish, while others like a more organic handmade edge. Again, it depends on the design.
Sanding and buffing
Sanding removes rough spots, fingerprints, and small imperfections. Wet sanding can reduce dust and give you more control. If you want a soft natural sheen instead of a shiny coated look, buffing after sanding can create a beautiful finish.
This is especially nice for minimalist pieces where the color and form do most of the talking. A carefully buffed surface can feel refined without looking overly glossy.
Glaze, resin, or matte finish
Not every polymer clay piece needs a topcoat. In fact, some look better without one. But for certain surface treatments, a glaze or resin finish can add depth and protection. Resin can create a glassy, high-impact shine, though it requires more care, time, and dust control. A matte sealant can soften the look if you want something understated.
The trade-off is that coatings can change the character of the piece. A raw or buffed clay finish often feels more artisan and earthy. A resin-coated piece feels brighter and more dramatic. Think about the mood you want the jewelry to carry.
Hardware and final assembly
Even beautifully made clay components can feel unfinished if the findings are poor quality. Earring posts, jump rings, clasps, and necklace bails should suit both the weight of the piece and the look of the design. Gold-tone hardware can warm up earthy palettes, while silver-tone findings often pair beautifully with cool tones and modern shapes.
Strong adhesive choices matter when attaching posts, but design helps too. A flat, well-supported attachment area is usually more dependable than gluing a post to a tiny curved spot. For pieces that get regular wear, thoughtful construction is part of the beauty.
Style-focused techniques for standout jewelry
Once you have the basics, you can start shaping a signature look. Layered arches create movement and are especially lovely for statement earrings. Marbled color blends can feel soft and artistic, while terrazzo mixes offer playful detail without needing advanced sculpting. Cane techniques allow repeated pattern elements, though they take practice and patience.
Mixed-media clay jewelry is also worth exploring. Polymer clay pairs beautifully with beads, tassels, metal charms, and semi-precious accents. If your style leans boutique and expressive, combining materials can create a richer finished piece. Scott Jewelry Design embraces that handmade spirit, where color, texture, and personality work together rather than feeling overly perfect.
Common problems and what usually causes them
If your pieces crack, the clay may not have been conditioned enough, or the design may be too thin in stress points. If you see fingerprints, the clay may be too soft or handled too much right before baking. If edges look ragged, the blade may be dull or the clay may need to firm up before cutting.
Burning usually points to oven temperature issues, while weak pieces often trace back to underbaking. These problems are frustrating, but they are also normal. Polymer clay rewards practice. A disappointing batch often teaches more than an easy one.
The most helpful mindset is to treat every project as part design session, part skill-building. Some days you will make a piece that feels gift-worthy right away. Other days, you will learn that a color mix looked better in your head than on the tile. Both are useful.
Jewelry making with polymer clay is part craft and part personal expression. The techniques matter because they support the story you want each piece to tell – bright and playful, earthy and boho, elegant and minimal, or full of bold handmade character. Start with the basics, pay attention to finishing, and let your style grow naturally from there. The best clay jewelry rarely looks like everyone else’s, and that is exactly the point.